Here’s something I love about Photoshop: you can do anything in it, and you can do anything 100 different ways. This can be daunting. And when it comes to doing things, it’s hard to know the fastest or most efficient way. Often we get stuck on the “tried and true” path, no matter how meandering or arduous, for fear that deviating may break something. Photoshop is massive, after all.
I know a few quick tricks in Photoshop and have developed some time-saving habits. After sharing one with someone, I realized not everyone may have thought to do things certain ways. So I thought I’d post a few of them. I’ll share this tutorial on creating a quick knock-out image using this very old concept logo I made several years back.
This requires that the image or layer you’re changing has a transparent background — that is, it’s not a solid, flat image, like a jpg.
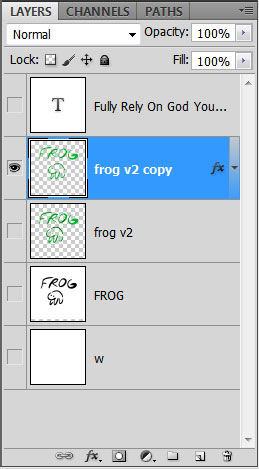
The raster layer I have selected has a transparent background, as signified by the checkered grey and white background. Transparent PNGs in Photoshop, as long as their image mode is “RGB”, will show as a single layer (“layer 0”) with no “Background” base layer.
What you want to do is make the image white so that it can show up on a dark background. You usually want to make an actual knockout version of the logo (for instance, the original version of this logo is a vector Illustrator file, and it would have an alternate white vector version), but if you need to make something quick for web purposes, the following is a good method.
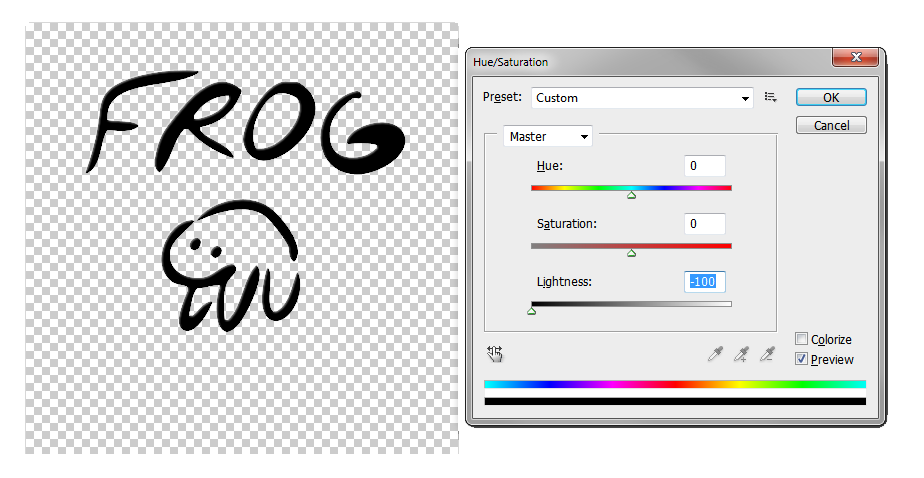
You want to go to Image > Adjustments > Hue/Saturation…

I love keyboard shortcuts as long as they don’t require more than two fingers, so I usually hit CTRL+U. This brings up a useful set of options I use frequently:

To make this layer white, move the Lightness slider all the way over to the right.

Bam! It’s that easy. You can move it all the way left to make it black, too: you may need a black version of the logo for similar reasons.
You could set up Photoshop actions for this as well to make the process even faster.
This is just one of those things people never may think of, especially if they don’t use Hue/Saturation very often. You could use this method to change the layer to any other solid color as well. Some people use fill layers, but I usually don’t. I also like to use Hue/Saturation to adjust the overall color in my artwork. For art created digitally, I also like to use this option to quickly change the color of lineart, since I’ll have it on its own layer. (I’ll feature that in a lineart tutorial, coming soon!)
That’s it for the first quick tip! Check in regularly for more: I’ll post them as I think of things.